ADVERTISEMENT
Step-by-Step Process
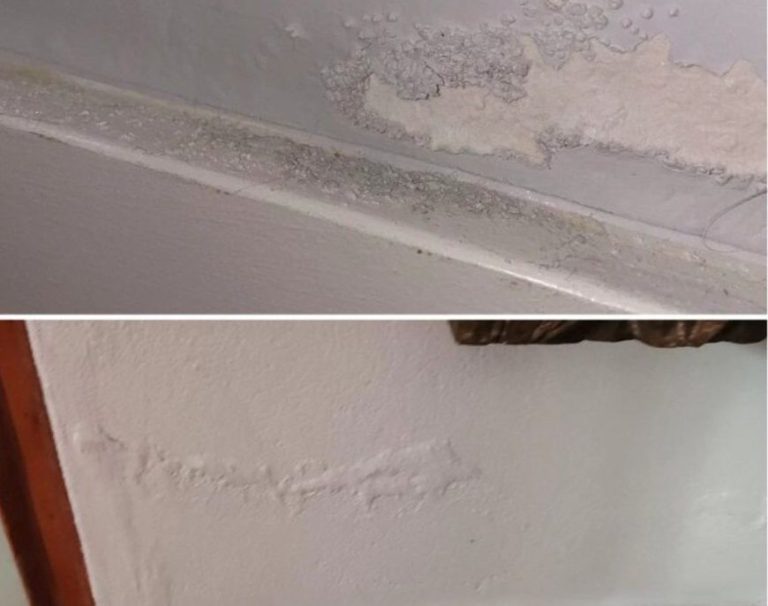
Step 1: Assess the Damage
Before starting any work, conduct a thorough assessment of the affected walls. Identify the height of the damp patches and note any areas where the plaster is crumbling or peeling. Determine how widespread the issue is, which will guide the extent of the repairs needed.
Step 2: Prepare the Area
Clear the Room: Move furniture or items away from the dampened area to ensure a safe working environment.
Protect Surrounding Surfaces: Use drop cloths or old sheets to protect floors and surfaces from dust and debris.
Step 3: Remove Damaged Material
Use a chisel and hammer to carefully remove any damaged plaster and paint from the walls up to the point of dryness. This will typically be above the visible damp line. Ensure you do not cause unnecessary damage to the underlying structure.
Tip: A wire brush can be effective in removing loose paint and debris from the wall surface.
Step 4: Treat the Affected Area
After removing the damaged plaster, clean the area with a damp cloth to remove dust. Allow the wall to dry completely.
Once dry, apply the damp-proofing compound or membrane according to the manufacturer’s instructions. This usually involves:
Applying a Primer: Some compounds require a primer to be applied first for better adhesion.
Rolling or Brushing on the Compound: Use a roller or brush to apply the damp-proofing material evenly onto the wall. Ensure complete coverage, paying special attention to corners and junctions.
Allow to Dry: Follow the manufacturer’s instructions on drying time.
Step 5: Repair the Wall
Once the damp-proofing compound is dry, it is time to restore the wall.
Mix Plaster: Follow the instructions on the packaging for mixing plaster to the right consistency.
Apply Plaster: Using a trowel, apply a new layer of plaster over the treated area, feathering out towards the edges to ensure a smooth finish.
Smooth Finish: Once the plaster is applied, smooth the surface with a trowel. Aim for an even finish that matches the surrounding wall.
Drying Time: Allow the plaster to dry completely, which may take several days depending on humidity and temperature conditions.
continued on next page
ADVERTISEMENT
