ADVERTISEMENT
How to make a self-watering planter from a plastic bottle for your seedlings and plants?
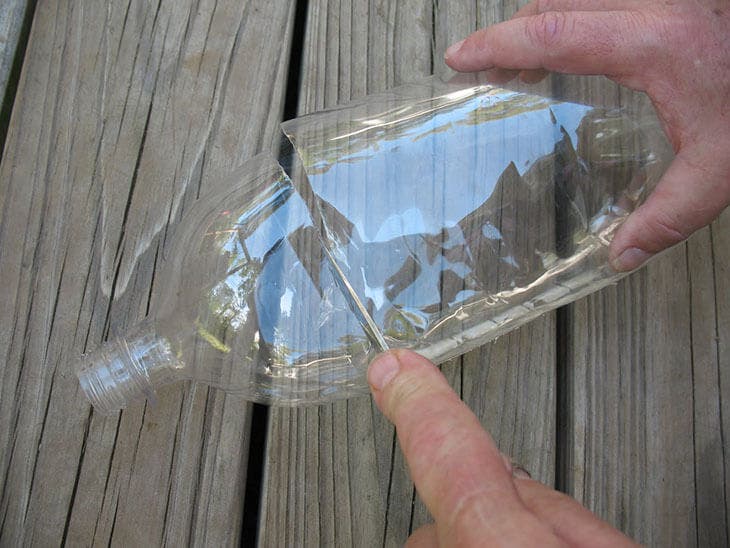
Take a clean, dry plastic bottle and cut it 2/3 of the way down the bottom using a sharp knife. Both bottoms will be used to prepare a self-watering pot.
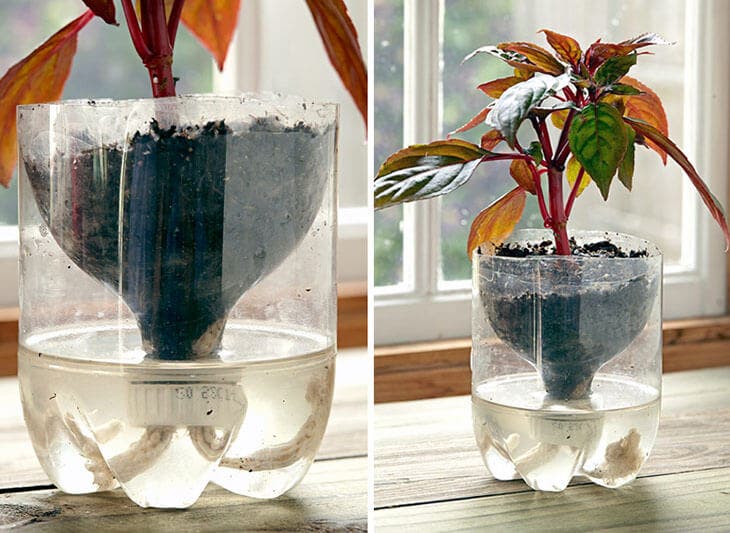
Unscrew the cap and drill a hole in the center. Take a piece of string the same size as the bottle, fold it in half and thread it through the hole. Tie the end inside the cap and screw the cap back on. Fill the bottom of the bottle with water, then invert the top of the bottle, cap down , and insert it into the bottom. Make sure the string is soaked in water. Fill the top of the bottle with potting soil and plant your seeds. Thanks to this trick, you will quickly get young shoots. In fact, the plastic bottle allows you to keep the heat , as a greenhouse would do. As for the string, it keeps the soil constantly moist. Your plants will be able to grow, without suffering from drought, even if it is hot.
You can transplant your plants into the ground or into pots, as long as the seedlings reach about 10 cm in height. The season must also be suitable for sowing.
Furthermore, the self-watering pot is not suitable for all plants. Indeed, those that do not appreciate having their roots constantly wet may suffer from excess humidity. This is also the case for succulents , which have a limited need for water. Indeed, these succulents have the ability to store water, thanks to their fleshy tissues. They can survive in dry and arid climates. On the other hand, plants that require frequent watering, such as geraniums and roses, will do well in a self-watering pot.
To keep your plants hydrated even when you are not there, you can consider another solution: make an automatic irrigation system that allows drip irrigation using a plastic bottle.
continued on next page
ADVERTISEMENT
