ADVERTISEMENT
2. Preparing Your Tools
Essential Equipment: Ensure you have clean, sharp bypass pruners, gloves, and optionally, lopping shears and a pruning saw for larger branches. Disinfect your tools with rubbing alcohol or a bleach solution to prevent disease spread.
3. Assessing Your Rose Bush
Observation First: Before making any cuts, take a moment to inspect your rose bush. Identify dead, diseased, or damaged wood, which should be removed. Look for any branches that cross or rub against each other, as these can create wounds that invite disease.
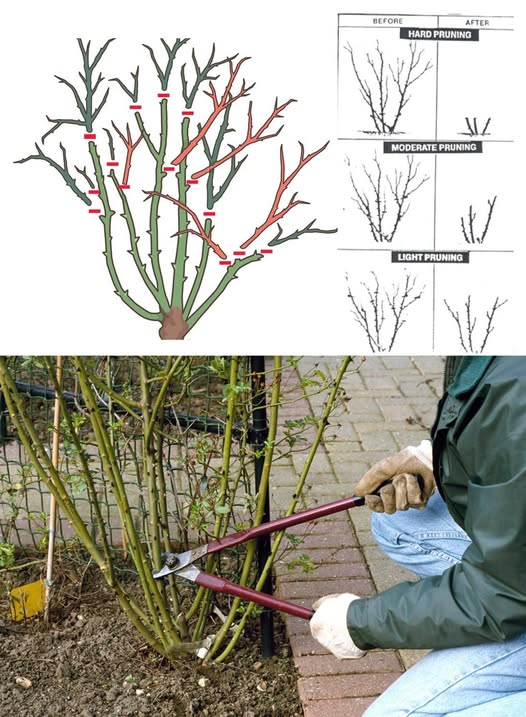
4. Making the First Cuts
Clear the Dead and Diseased: Begin by removing any dead, diseased, or damaged wood. Cut these branches back to healthy tissue, ensuring a clean cut that angles away from the center of the plant to promote water runoff.
5. Thinning for Air and Light
Promote Good Airflow: Remove any thin, weak growth and interior branches that crowd the center of the bush. This thinning process helps improve air circulation and light penetration, essential for healthy growth and flowering.
6. Shaping the Bush
Form and Function: After cleaning up the rose bush, focus on shaping it. Aim to create an open vase shape, which allows for optimal air flow and light exposure. Make cuts about 1/4 inch above an outward-facing bud, slanting the cut away from the bud to encourage growth in the desired direction.
continued on next page
ADVERTISEMENT
