Essential tools for repair
Before you begin, you will need:
- An adjustable wrench or a suitable open-end wrench
- A screwdriver
- A replacement gasket or ceramic cartridge (depending on your faucet model)
- Teflon tape for better sealing
- A cloth or sponge to clean up any residue
- A bucket to collect residual water
Steps to Fix a Leaking Faucet
- Turn off the water supply
Before any manipulation, turn off the water to avoid flooding. You will usually find a shut-off valve under the sink or direct at the water meter .
- Disassemble the faucet handle
Using a screwdriver, remove the holding screw the faucet handle or knob, then removed it to access the internal parts .
- Access the internal mechanism
Depending on your faucet type:
- Seal tap: Unscrew the main nut to reach the rubber seal .
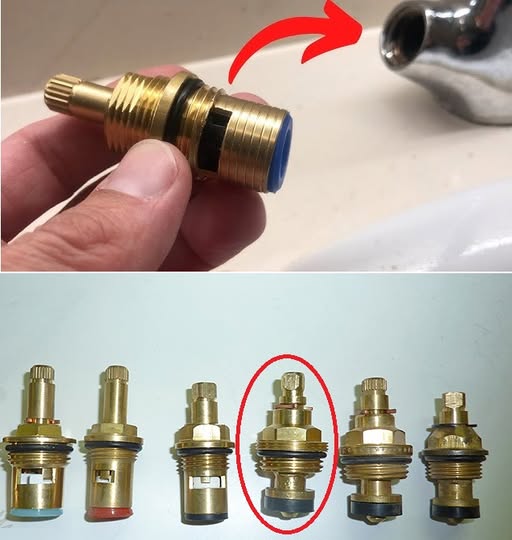
- Cartridge mixer: Remove the old ceramic cartridge that regulates the water flow.
- Replace the seal or cartridge
- If your faucet uses a gasket, replace it with a new one of the same size.
- If your faucet works with a ceramic cartridge, insert a new cartridge compatible with your model.
- Reassemble the tap
Replace the parts in the correct order , tighten the main nut , then replace the handle .
- Check the tightness
Turn the water supply back on and test your faucet. No more leaks? You’ve successfully fixed the repair.
Tips for an even more effective repair
- Use Teflon tape on the threads for optimal sealing.
- Clean off any limescale deposits before reassembling the faucet.
- Check the condition of the other seals , as a leak can be caused by a simple worn seal.
Why repair a faucet yourself?
- Save money: Avoiding a call to the plumber can reduce your expenses
- Save time: in less than 30 minutes , your faucet is repaired.
- Personal satisfaction: learning to repair yourself is practical and rewarding .
With these simple tips, you can solve most faucet leaks without stress. So, are you ready to take on the challenge?
Pages: 1 2