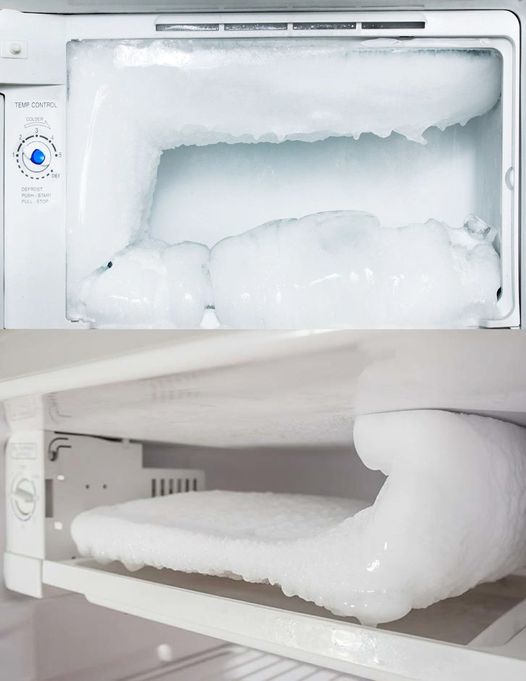
Step 3: Let thawing begin
Open the doors of the refrigerator and freezer, allowing room temperature to start the melting. For a faster process, place a hot water saucepan inside, remembering to replace it periodically while it cools.
Step 4: Scratch carefully
If the thick ice cream persists, gently use a plastic scraper or a spatula (never made of metal) to encourage it to become detached. Exercise and caution in avoiding damage to your refrigerator.
Step 5: Deep cleaning
Although the inside is bare and accessible, take the opportunity to clean it thoroughly. Wipe all surfaces, paying particular attention to corners and hidden places where dirt could build up.
Step 6: Dry and restart
Make sure the inside of your refrigerator is completely dry to prevent immediate re-icing. Put the shelves and trays back on, reconnect the refrigerator, and waited patiently for it to return to a cold state before replenishing you.
Step 7: Organize and replenish
When you replace articles, think about the organization. This may be the perfect time to implement a new system, ensuring that items are easily accessible and that expiry dates are visible in order to minimise food waste.
Pro tip: Prevent future freezing
Regular checks: Periodically inspect your refrigerator for the early stages of frost build-up and resolve it quickly.
Inspection of seals: Make sure the door seals are in perfect condition, keeping the air cold where it should be, inside.
Balanced temperature: Maintain an optimal temperature of the refrigerator (ideally around 37oF and 0oF for the freezer) to prevent frost formation.
By adopting this simple method, you would effortlessly and safely make sure that your refrigerator is safe from frost and is working at its peak. You will save energy, preserve the longevity of your device and perhaps discover this forgotten frozen pizza behind the ice.
It’s simple, it’s effective, and it won’t take your day. Enjoy a frost-free refrigerator and make ice cream build on a thing of the past.
Note to reader
Keep this guide for the next time you face frosted enemies in your refrigerator. With these simple steps, you don’t just thaw; you give your device a fresh start, reduce your energy costs, and make sure that these midnight snacks are always easily accessible.
Disclaimer: This article is created for information purposes and does not replace the advice of a professional. Always focus on safety and consult your device manual or a professional technician for specific advice related to your model.
This easy guide ensures that defrosting your refrigerator is a task that will not leave you cold. Use it wisely, share it with frost-furged friends, and here are quick and seamless de-icing adventures in your future.