ADVERTISEMENT
Gently wipe the surface using light to moderate pressure. For general grime, a simple wipe will often suffice. For more stubborn or sticky areas, allow the solution to sit for a minute or two to let the powerful surfactants and enzymes break down the dirt, then gently scrub in small circular motions. Always wipe with the grain of the wood if you have natural wood cabinets to prevent streaking and ensure an even clean. Avoid harsh scrubbing or abrasive motions, as this can damage the finish. You’ll notice the grime lifting almost immediately, turning your cloth dark with the accumulated dirt. This visual confirmation is incredibly satisfying, driving you forward to tackle the next section. But don’t forget the hidden spots that often betray an otherwise clean cabinet.
Precision Cleaning: Navigating Knobs, Hinges, and Crevices
While the broad surfaces of your cabinets will gleam, the true mark of a meticulous clean lies in the details. Knobs, handles, hinges, and the intricate crevices around cabinet doors are often forgotten hotspots for grease and dirt accumulation. These small, often overlooked areas can harbor years of grime, making an otherwise clean cabinet appear unfinished or still dirty. This is where your precision tools come into play. Dip your old, soft-bristled toothbrush into the cleaning solution and gently work it around the edges of knobs and handles, into the grooves of door panels, and along the seams where two pieces of wood or laminate meet. The bristles can reach where a cloth simply cannot, dislodging stubborn dirt that has become embedded.
For even tighter spots, like the tiny gaps around hinge plates or intricate carvings, a cotton swab dipped in the solution will prove invaluable. Apply gentle pressure and allow the solution to penetrate, then wipe away with a clean, damp swab. Don’t neglect the top edges of your upper cabinets, where dust and grease often form a thick, sticky layer. These areas are easily missed but contribute significantly to the overall cleanliness of your kitchen. Paying attention to these often-neglected details elevates your clean from good to truly exceptional, ensuring every inch of your cabinets sparkles with renewed life. Once these hidden pockets of grime are conquered, you’re ready for the crucial final steps.
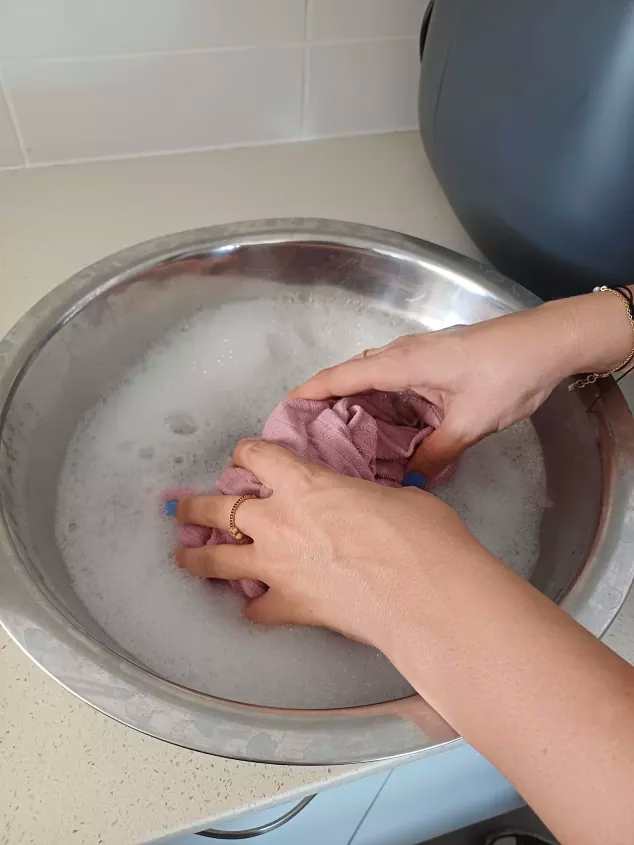
The Rinse and Reveal: Wiping Away the Years of Grime
After the Dawn and Tide solution has worked its magic, dissolving and lifting countless layers of grease and grime, the rinse phase is paramount. This isn’t just about wiping; it’s about removing every trace of the cleaning solution and the loosened dirt, ensuring a streak-free, residue-free finish. Skipping or skimping on this step can lead to a dull film, attracting new dirt almost immediately, or even potential damage to your cabinet finish over time. Imagine painstakingly cleaning a surface, only for it to be left with a subtle, sticky residue – incredibly frustrating, right? This is where your second bucket of clean water and fresh microfiber cloths become your best friends. This step is the true ‘reveal,’ showcasing the astonishing transformation that has taken place, bringing your cabinets back to their original glory. Prepare to be amazed as the true color and luster of your cabinets emerge, unburdened by years of accumulation.
The Double-Check: Ensuring No Residue is Left Behind
To ensure a flawless, streak-free finish, the rinsing process needs to be thorough. Dip a clean microfiber cloth into your bucket of fresh, clean water. Wring it out extremely well – it should be damp, not wet. Excess water is the enemy here, especially on wood cabinets. Carefully wipe down the section you just cleaned with the Dawn and Tide solution. The goal is to remove all traces of the soapy mixture and the suspended dirt particles. You might be surprised at how much dirt still comes off, even after the initial cleaning pass. It’s often this rinsing step that truly reveals the depth of cleanliness achieved. For absolute perfection, it’s often beneficial to perform a second rinse with an even cleaner cloth and fresh water. This might seem redundant, but it ensures that no microscopic residue remains behind, which could otherwise dull your cabinets or attract new dust. Run your hand over the surface – it should feel smooth and clean, without any stickiness or slickness. This tactile check is a simple yet effective way to confirm your success. Once you’re confident that all residue is gone, you’re ready for the final, equally vital step: drying.
The Drying Dilemma: Protecting Your Cabinets from Moisture
The final, yet often overlooked, step in this brilliant hack is proper drying. After rinsing away the cleaning solution and grime, it is absolutely crucial to thoroughly dry your cabinets immediately. Leaving moisture on cabinet surfaces, particularly those made of wood or with delicate finishes, can lead to swelling, warping, watermarks, or even mold growth over time. Dampness is a cabinet’s silent enemy, capable of undoing all your hard work. Grab your third, completely dry and clean microfiber cloth. Wipe down the entire cleaned area with firm, even strokes until the surface is completely dry to the touch. Pay special attention to corners, edges, and crevices, as water tends to pool in these areas. You might even use a second dry cloth for a final buff to ensure a brilliant, streak-free shine. For wood cabinets, you might also consider a light fan or even a hairdryer on a cool setting for a few minutes to ensure every last bit of moisture has evaporated, especially if the humidity in your kitchen is high. Remember, the goal is not just clean, but *dry* clean. This final act of care protects your cabinets and locks in their newfound brilliance, ensuring they remain a stunning feature of your kitchen for years to come. Now that your cabinets are gleaming, let’s explore how to maintain that sparkle and tackle any lingering challenges.
Troubleshooting and Advanced Tips: Overcoming Cleaning Hurdles
While the Dawn and Tide hack is remarkably effective, you might encounter a few unique challenges depending on the age, material, or severity of grime on your cabinets. Don’t despair if a spot proves particularly stubborn or if you’re unsure how the solution will react to a specific finish. Every cleaning challenge offers an opportunity for mastery, and with a few advanced tips, you can conquer even the most formidable cleaning hurdles. This section will empower you with the knowledge to troubleshoot common issues and fine-tune your approach for truly exceptional results. Remember, the journey to a sparkling kitchen is a learning process, and these insights will make you a seasoned pro in no time. Prepare to unlock the expert-level strategies that push this brilliant hack to its absolute limits, ensuring no grime stands a chance.
Tackling the Toughest Grime: Expert-Level Strategies
Sometimes, despite the power of Dawn and Tide, certain areas on your cabinets might have accumulated an exceptionally thick layer of old, hardened grease or stubborn stains that just won’t budge with a single pass. For these truly challenging spots, a slightly modified approach is needed. Instead of simply wiping, you’ll want to extend the dwell time of the solution. Apply a more concentrated amount of the Dawn and Tide mixture directly to the stubborn spot using a sponge or a saturated cloth. Allow it to sit for five to ten minutes, giving the surfactants and enzymes more time to penetrate and break down the grime. You might even gently re-apply a fresh layer of solution during this time to keep the area moist. After the dwell time, gently scrub with a soft-bristled brush or the non-abrasive side of a sponge. Avoid metal scourers or harsh abrasives, which can scratch and damage your cabinet finish. In rare cases, a second application and dwell time might be necessary. Remember to always rinse thoroughly and dry immediately after. For truly extreme build-up, you might consider carefully scraping off the thickest layers with a plastic scraper (like an old credit card) before applying the solution, but only if you are confident it won’t scratch the surface. Persistence, combined with these targeted strategies, will ensure even the most neglected cabinets surrender their grime.
SEE NEXT PAGE
ADVERTISEMENT
