ADVERTISEMENT
Step 2: Unmasking the Heart – Deep Cleaning Burner Heads and Spark Igniters
With the grates and burner caps sparkling, you might feel a surge of accomplishment. But beneath those now-gleaming exteriors lies the true engine of your gas stove: the burner heads and their delicate spark igniters. These components are responsible for the precise delivery and ignition of gas, and their optimal function is paramount to both the efficiency and safety of your cooking. Neglecting them can lead to weak, uneven flames, higher gas consumption, and frustrating ignition issues. This section demands a gentle touch and meticulous attention, as these parts are more intricate and sensitive than the robust grates.
Think of the burner head as a finely tuned instrument, with tiny holes designed to release gas evenly for a clean, efficient flame. Over time, these holes can become clogged with food debris, grease, or even cleaning solution residue if not handled carefully. The spark igniter, that tiny ceramic or metal prong that creates the spark, is equally vulnerable to obstruction. A successful clean here means not just removing visible dirt, but ensuring the clear pathways for gas and an unobstructed path for the spark. Get ready to unveil the hidden potential of your stove’s core. You might be surprised at how much difference this step makes.
The Delicate Nature and Why Blockages Matter
Before you begin, understand that burner heads (often made of brass or aluminum) and spark igniters are more fragile than the cast iron grates. They can be easily damaged by harsh abrasives or excessive force. The tiny gas ports on the burner head are precision-engineered. If these ports are even partially blocked, you’ll notice a flame that is weak, uneven, or produces more orange and yellow hues instead of a strong, consistent blue. This indicates inefficient combustion, meaning you’re wasting gas and not getting the most out of your cooking.
The spark igniter, typically a ceramic or metal probe near the burner, must be kept clean and dry to function properly. Grease, food particles, or even moisture can prevent it from creating that essential spark, leaving you repeatedly turning the knob, hearing clicks, but seeing no flame. This is not only annoying but can also lead to a buildup of unignited gas, posing a safety risk. Therefore, cleaning these components is not just about aesthetics; it’s about restoring optimal performance and safeguarding your kitchen.
Disassembly Precautions and Initial Assessment
Just as with the grates, ensure the stove is completely cool and the gas supply is turned off. Then, carefully lift off the burner caps, followed by the burner heads themselves. These usually just sit on top of the gas tube, but sometimes they might be lightly secured. Take note of how each piece fits together, as reassembly needs to be precise. Some stove models may have different designs for their burner heads; consult your stove’s manual if you’re unsure how to remove them.
Once removed, inspect each burner head. Look closely at the small holes or ports from which the gas emanates. Are they clogged with debris? Is there a greasy film over them? Also, examine the spark igniter for any visible buildup. This initial assessment will guide your cleaning efforts and help you focus on the areas that need the most attention.
Cleaning Blocked Burner Holes: Precision is Key
This is where the precision tools come into play. For clogged burner ports:
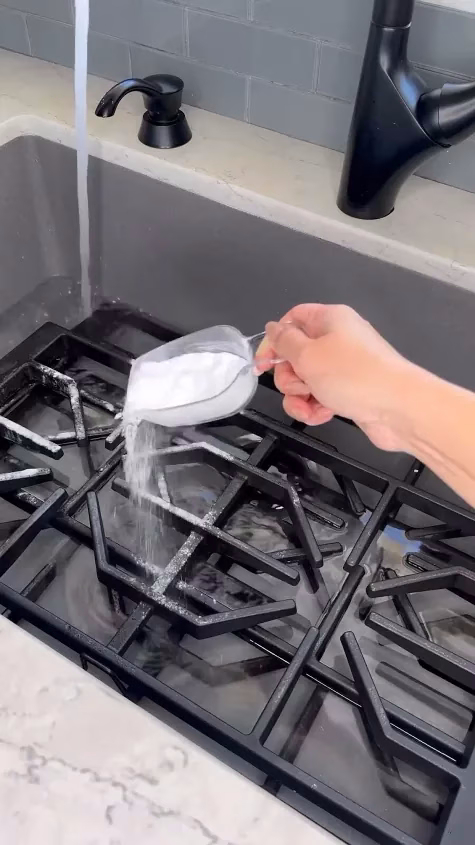
- Soak (Gentle Version): You can gently soak the burner heads in a bowl of warm, soapy water (dish soap only) for about 15-20 minutes. This helps to loosen any greasy film. Avoid soaking the igniter probes themselves if they are attached to the burner head. For components that cannot be detached, a damp, soapy cloth is better than direct soaking.
- Clear with a Pin or Paperclip: After soaking (or even without, if not heavily soiled), use a small, unfolded paperclip, a sewing needle, or a specialized burner port cleaner to gently poke through each and every hole. Be thorough! You’ll be surprised what comes out. Twist the tool gently to dislodge stubborn debris. This is crucial for restoring even flame distribution.
- Brush and Rinse: Once all holes are clear, use an old toothbrush or a small, stiff brush to gently scrub the entire burner head, removing any loosened grime. Rinse thoroughly under running water, ensuring all soap residue is gone. It’s vital to ensure *no* water enters the gas orifice tube that the burner head sits on. If water enters it, it can cause ignition problems later.
- Dry Completely: This is arguably the most important step for burner heads. Moisture can interfere with gas flow and ignition. Towel dry them as much as possible, then allow them to air dry completely for several hours, or even overnight. You can also place them in a low-temperature oven (turned off, with just residual heat) for 10-15 minutes, or use a hairdryer on a cool setting. They must be bone dry before reinstallation.
The difference a clear burner head makes is astounding. You’ll notice a stronger, more even blue flame that heats your pans more efficiently, reducing cooking times and gas usage. But what about the spark igniter?
Spark Igniter Care: A Dry and Gentle Approach
The spark igniter is very sensitive to moisture and debris. Treat it with care:
- Dry Brush/Wipe: Use a dry, clean old toothbrush or a stiff, dry paintbrush to gently brush away any accumulated food debris or carbon from the ceramic part of the igniter and its metal tip. Do NOT use water directly on the igniter, especially if it’s connected to wiring.
- Damp Cloth for Grease: If there’s greasy residue, slightly dampen a microfiber cloth with rubbing alcohol or a tiny amount of dish soap solution, wring it out *very* thoroughly so it’s barely damp, and gently wipe the igniter. Immediately follow up with a dry cloth to absorb all moisture.
- Check for Damage: While cleaning, inspect the igniter for any cracks in the ceramic or bends in the metal tip. Damaged igniters may need to be replaced by a qualified technician.
A clean, dry igniter ensures quick and consistent ignition every time you turn the knob. But remember, the cleanliness of the burner head directly impacts the cleanliness of the igniter, as gas flow and flame distribution can prevent or encourage further buildup. Once these intricate components are gleaming and dry, it’s time for reassembly and then the grand finale: tackling the cooktop surface itself. You might think that’s the easiest part, but there are secrets to achieving a truly streak-free, polished shine that goes beyond mere wiping. What unexpected techniques will bring your cooktop to life?
SEE NEXT PAGE
ADVERTISEMENT
