ADVERTISEMENT
Step 1: Steam It Out
Place a microwave-safe bowl with:
½ cup water
½ cup white vinegar
Or 1 lemon, sliced and submerged
Microwave for 3–5 minutes until boiling and steam fills the cavity.
Let sit for 5 minutes — then wipe gently with a damp cloth.
✅ Why it works: Steam loosens grime without scrubbing.
Step 2: Avoid Steel Wool and Abrasive Pads
Use only soft cloths, microfiber wipes, or silicone scrubbers.
Hard materials are like sandpaper to your microwave’s delicate surface.
Step 3: Clean Daily (Or At Least Weekly)
A quick wipe-down after each spill keeps acids from settling in and eating away at the finish.
Especially after:
Tomato sauce
Citrus
Soy sauce
Cheese
Coffee
A little maintenance goes a long way.
🛠️ How to Prevent Future Damage
Cover food when heating
Reduces splatters and steam buildup
Clean immediately after spills
Stops acids from eating into the surface
Avoid harsh chemicals
Preserves coating integrity
Don’t use metal containers or aluminum foil
Sparks and arcing risk
Rotate the turntable manually during cleanings
Ensures nothing gets stuck or built up underneath
Also, check the door seal regularly — a faulty one leads to more steam leakage and condensation around the edges.
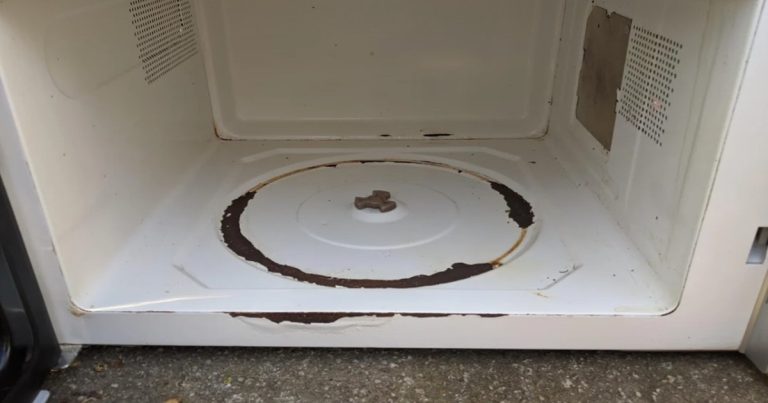
🧊 Bonus: What to Do If It’s Already Peeling
If the damage is minor:
Gently scrape off loose bits
Wipe with vinegar-water solution
Avoid using anything that causes sparking
If it’s major:
Arcing begins
Rust forms
Coating continues to flake
Consider replacing the microwave — or at least its interior plate.
Some models allow replacement of the cavity tray — but once rust sets in, it’s best to retire the unit safely.
💡 Final Thoughts: Microwaves Are Like Teeth — They Need Daily Care
We often forget that our appliances need more than just power.
They need protection from misuse , gentle cleaning , and consistent love .
So next time you see something bubbling inside your microwave…
see continuation on next page
ADVERTISEMENT
