ADVERTISEMENT
19 Rainwater Collecting Ideas That Are Functional, Beautiful, and Easy to Build
Materials Needed:
- 2 or more 55-gallon plastic barrels (standard size: 35″ height x 23″ diameter)
- Jigsaw
- Drill
- Screws or bolts (1″–2″)
- Waterproof sealant
- Brackets (optional)
- Fine sandpaper
Step-by-step Guide:
Step 1: Place the barrels on their sides where rain naturally flows off your greenhouse or shed. Use chalk or marker to outline a large U-shaped section across the top.
Step 2: Carefully cut along the outline using a jigsaw. Remove the section and sand the cut edges.
Step 3: Push the barrels snug against the structure to collect rain runoff. Use wood planks or brackets to secure them in place if needed.
Step 4: Add a drainage hole or faucet at one end if you want to redirect or store the collected water.
#4. Funnel-Top Rain Barrel Collector

Perched on top of a red barrel, the wide plastic basin captures even light rainfall and channels it straight into the tank.
Materials Needed:
- 1 red 55-gallon plastic barrel
- Wide plastic funnel or rigid basin (3–4 ft diameter)
- Hose bib/spigot
- 4 concrete blocks
- Hose (optional)
- Drill, sealant
Step-by-step Guide:
Step 1: Place the barrel on a sturdy base made from stacked concrete blocks. This gives height for hose pressure and spigot access.
Step 2: Drill a hole near the base and install a spigot, sealing tightly to prevent leaks. Attach a hose if needed for garden use.
Step 3: Cut or adjust the barrel lid to allow the funnel to rest securely on top. Make sure the center directs water into the barrel.
Step 4: Secure the funnel with ties or weight if in a windy area, and position the setup in an open spot with good sky exposure.
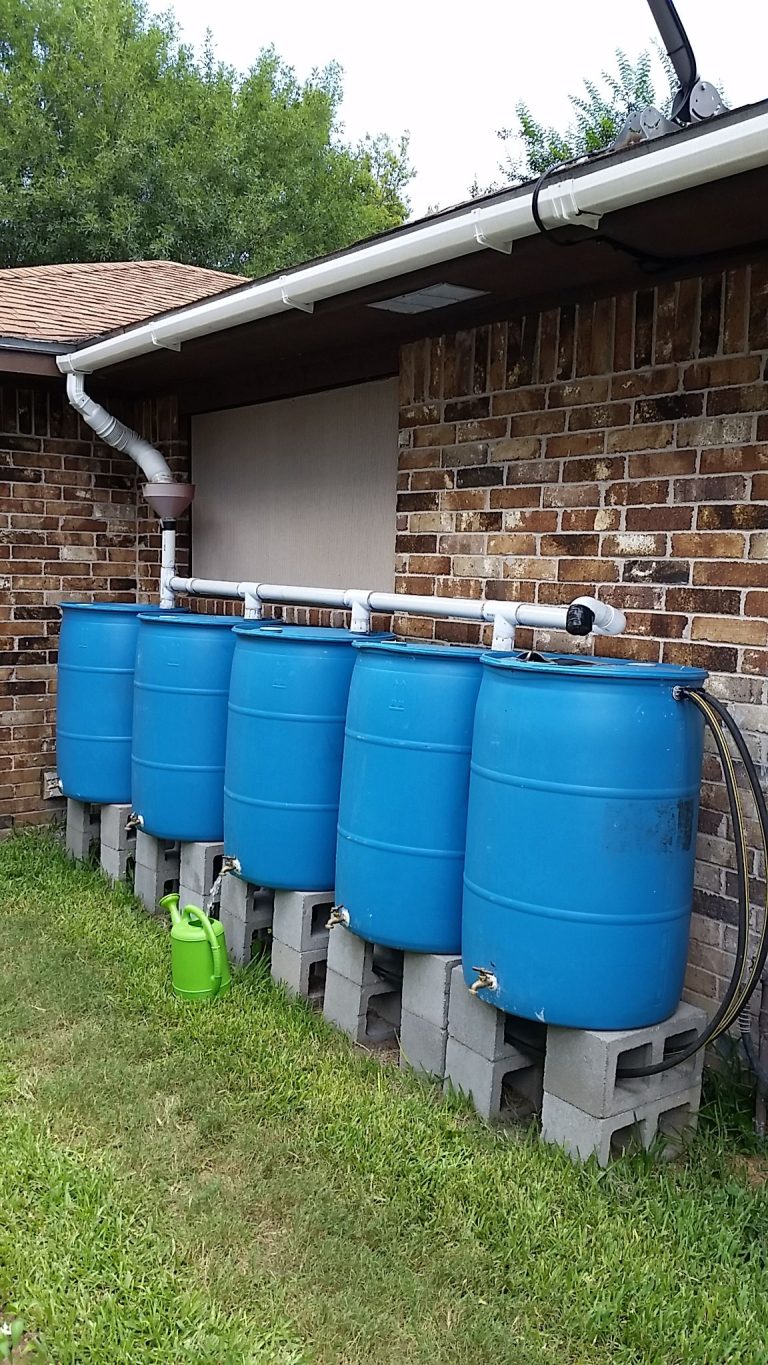
#5. Heavy-Duty IBC Tote Rain Collector

When serious water storage is your goal, an IBC (Intermediate Bulk Container) tote is the way to go. This setup features a massive 275-gallon tank encased in a custom wood frame for added strength and stability.
Materials Needed:
- 1 IBC tote (275 or 330-gallon capacity)
- 2″–3″ diameter PVC pipe or downspout
- 6–8 wood beams (2″x4″ and 4″x4″)
- Screws, brackets, and L-plates
- Saw, drill, level
- Hose and fittings
Step-by-step Guide:
Step 1: Build a wooden frame around the IBC tote using 4″x4″ posts for corners and 2″x4″ planks for cross bracing. Use brackets and screws for reinforcement.
Step 2: Position the tote near a roof runoff point. Angle a PVC pipe or downspout from the roof into the tote’s top port to collect rainwater.
Step 3: Ensure the tank is level and stable. Use bricks or pavers underneath if needed.
Step 4: Connect a hose or spigot to the bottom valve for easy water access. Secure all joints and fittings to avoid leaks.
continued on next page
