Over time, it’s common for walls in our homes to develop imperfections such as scratches, cracks, and fissures. While these blemishes can detract from the aesthetic appeal of your space, many are straightforward to repair. However, it’s crucial to understand the nature and severity of the damage before attempting any fixes. This guide will help you differentiate between minor and major wall issues and provide detailed steps to address them effectively.
Understanding Wall Imperfections
Before diving into repairs, it’s essential to identify the type of damage:
Scratches: These are superficial marks, typically affecting only the paint or plaster surface. They are shallow, usually less than 1 centimeter deep, and don’t compromise the wall’s structural integrity.
Fissures: Slightly deeper than scratches, fissures range from 1 to 3 centimeters in depth. While they penetrate more deeply, they are generally safe to repair if they don’t allow external elements like rainwater or wind to pass through. However, if fissures are near structural components such as beams, columns, or slabs, it’s advisable to consult a professional to rule out underlying issues.
Cracks: These are significant openings, often exceeding 3 centimeters in depth. Cracks can indicate serious structural problems and should not be addressed without professional assessment. Attempting to repair such cracks without expert insight may conceal critical issues that could worsen over time.
When to Repair and When to Seek Professional Help
Determining whether a wall imperfection is a DIY project or requires professional intervention depends on its characteristics:
Safe to Repair Yourself: Minor scratches and fissures that don’t compromise structural elements or allow external factors into your home can typically be managed with DIY methods.
Consult a Professional: Cracks deeper than 3 centimeters, especially those near structural components, or any damage that seems to affect the building’s integrity, should be evaluated by a structural engineer or a qualified contractor.
Step-by-Step Guide to Repairing Minor Wall Imperfections
If you’ve determined that the damage is minor and safe to repair, follow these steps to restore your wall’s appearance:
Materials Needed:
Putty knife or scraper
Sandpaper (100-grit and 220-grit)
Patching compound or spackling paste
Primer
Paint matching the existing wall color
Clean cloth or sponge
Protective gloves and eyewear
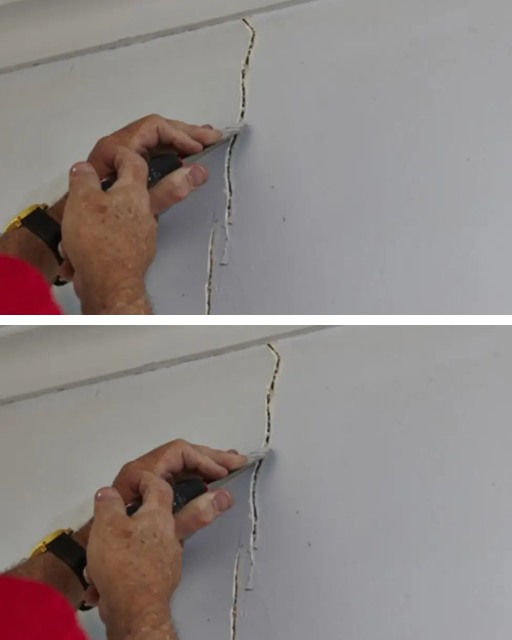
1. Prepare the Area
Begin by ensuring the damaged area is clean and free from loose debris:
Use a putty knife or scraper to remove any flaking paint or plaster around the imperfection.
Lightly sand the area with 100-grit sandpaper to smooth any rough edges.
Wipe the area with a damp cloth or sponge to remove dust and allow it to dry completely.
2. Apply the Patching Compound
Once the area is prepped:
Using a putty knife, apply a thin layer of patching compound or spackling paste to the damaged area.
Ensure the compound fills the imperfection completely and extends slightly beyond the edges to blend seamlessly with the surrounding wall.
Allow the compound to dry as per the manufacturer’s instructions. Drying times can vary based on the product used.
3. Sand the Repaired Area
After the patching compound has dried:
Sand the area with 220-grit sandpaper to achieve a smooth, even surface that aligns with the rest of the wall.
Be gentle to avoid removing too much of the compound.
Wipe away any dust with a clean, damp cloth and let it dry.
4. Prime the Surface
Priming is a crucial step to ensure the paint adheres properly:
Apply a coat of primer to the repaired area using a brush or roller.
This seals the patching compound and prevents uneven paint absorption.
Allow the primer to dry completely.
see continuation on next page